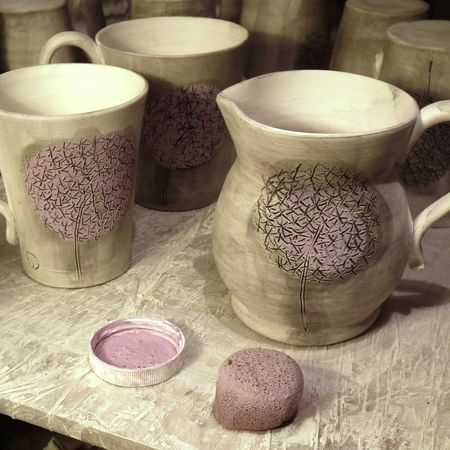
Interested in how it's made?
At a recent craft fair a woman spent about 20 minutes rummaging through the seconds box, before deciding to buy a couple of mugs. Whilst we were wrapping them for her she looked up from digging the money out of her purse and said "you didn't make them did you?"
Because we spend all our time making them we tend to forget that other people often don't think or care about how something is made, or where it came from.
However, thankfully, lots of my customers do. So for those of you who are interested, this is my attempt at explaining the process, not to mention justifying the fact that a handmade mug is so much more expensive than a machine made one from the supermarket. It also explains why if you find me at a craft fair or exhibition you can't order something for next week. It won't even be dry by then!
MAKING A POT
I use mostly stoneware (Earthstone) clay, which arrives on a pallet in red plastic sacks from Stoke where it is made. All the other ingredients also still come from Stoke on Trent, and are British as far as possible. Frames for my pictures are made locally.
Most of my pots are thrown on an ancient wheel, although some are also hand built, or made using plaster moulds. Once I have got the shape I am looking for the pot is left to dry to leather hard (this takes a few hours to several days in winter). It can then be handled without collapsing which means handles, decoration and the bases can be turned. I use coloured slips, lace, stamps, found objects and other tools to decorate.
When the pot is finished it is left to dry slowly, taking days - or weeks in cold weather. It can then be sponged to get rid of any imperfections before going in the kiln for first firing. This is the slow "bisque" firing which removes any remaining moisture and turns the clay into a fired pot. It takes about 10 hours and the kiln goes up to 1,000C or more - 4 times the temperature of a normal oven on full blast! (The kiln is in my laundry room to take advantage of all that heat, but is also great for proving dough for pizzas).
Once it has cooled, which takes another 24 hours, the pot is ready for more decoration and/or glazing. Glaze is made up from a list of ingredients which reads like a chemistry lesson. It's a bit like cooking; they all need weighing out, sieving and mixing and if you get it wrong it doesn't work.
The pot is then dipped in the glaze and the bottom cleaned off so that it doesn't stick to the kiln shelf. It then goes in to a glaze firing, to either 1,230C or 1,250C depending on the decoration and glaze. This time opening the cooled kiln is really exciting. There is the suspense of seeing whether it has worked, and hopefully getting a pile of lovely new pots.
It is all a very time consuming process, but completely addictive, particularly when it goes well!
